P-400 Airacobra

At the end of 2023 Arma Hobby released a couple of new kits, amongst them another variant of the Airacobra fighter in 1:72 scale. Let's take a closer look.
Disclaimer
The review sample was kindly provided by the manufacturer. Thanks, Arma Hobby.
First look
Set with catalogue number 70057 tempts modellers with quite nice looking boxart.
Advertised on the box 3D printed parts are in fact just one element. Apart from it, kit contains two light grey injection sprues, a transparent one, masks, a decal sheet, manual and metal weights.
It is worth mentioning that this is not a completely new entry in the Arma Hobby’s range. The P-400 variant was a part of the “Cactus Air Force” two-pack released some time ago (see review).
Light grey sprues
The plastic parts display the execution standard to which the Polish manufacturer has already accustomed us. Like the traditionally split fuselage covered with a grid of recessed, relatively fine panel lines.
Arma Hobby decided to not reproduce the full riveting of the airframe – but this doesn’t mean that these and similar details (e.g. access panels fasteners) cannot be found on the parts surface at all.
The top carburettor air intake lacks the characteristic crossbar, but overcoming this unacceptable simplification shouldn't be difficult for anyone.
The cut-out in the nose was prepared for two, slightly different versions of machine gun ports section (parts 21 and 22), which will remain on the frame this time. For P-400 variant a resin 3D printed alternative is provided.
Another sign of the kit's multi-variant nature is the three-bladed propeller, or rather propellers – there are three provided. Building either of the machines featured in this kit, one should use piece representing Curtiss (61) prop.
Two Aeroproducts alternatives (59 & 60) will be left hanging on the frames.
Solid 20mm cannon (71) goes into the spinner (58). 30mm barrels with (72) or without (73) the shield are useless this time.
A similar case applies to the exhausts. After fitting the appropriate for this version twelve-pipe units (53), we are left with the six-pipe variant (52) on the frame.
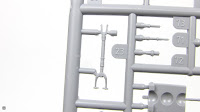
Rear of the fuselage is where the stabilisers belong. The vertical one.
And horizontal.
The corresponding control surfaces, with a somewhat overdone details, can therefore be tilted without any problems. Both the rudder.
As well as the elevator. Although in this case it should also be mentioned that the designer of the model has given us one trim tab too many (if I’m not mistaken there should be only the left one).
The ailerons and flaps are not poseable, as these were designed as part of the wing halves, which are otherwise quite nicely detailed.
Reflector recess can be found under the left wing. The rest of the airframe lighting was reproduced directly from the grey plastic (which could already be noticed on the vertical stabiliser).
Radiator air outlets located on the wing underside…
…are covered by inconspicuous flaps (29, 30, 31).
The leading edge air intakes are divided between the lower…
…and upper wing sections.
This is completed by the element (35) which is also the rear wall of the front wheel recess.
Mounting slots have been prepared for the wings' machine guns (28), behind which you can notice the shell ejection chutes.
Elements of the main landing gear bay have been reproduced on the inner surface of both the upper and lower part of the wings.
The inner landing gear covers were reproduced together with the part of the bay sides, which is an interesting design choice.
Their supports have not been forgotten either (48, 49).
The gear-mounted covers sport some of the kit few sinkmarks. Fortunately, these are easy to remove.
On the inside of one of the covers there was even room for an ejector pin mark. This will be a little more difficult to deal with.
Fortunately the struts (38, 39) will obscure that area a bit.
The wheels, on which you can see tiny “Firestone” logo, are quite nice. Although without any sign of tread.
The front ones aren’t ugly either. Two versions, part 42 is the one for P-400.
Assembly of the front gear (23-26) involves bending one of the components (25), which of course is mentioned in the instruction.
The front bay covers, designed as separate elements, feature some details of the internal structure.
Meanwhile the bay itself sports raised rivets on the structural elements.
Enclosed from the top by a shelf with some cannon details and machine guns' ammunition boxes. And a few ejector pin marks. On the other side of it are indentations for the metal weights supplied with the model.
Front wheel compartment ceiling details can be found on the part that is also the floor of the cockpit, which was designed together with the propeller drive shaft cover visible in the landing gear bay.
Since we mentioned the cockpit – let's take another look at the fuselage halves, this time from the inside, where the structure of the sides is indicated.
In between, the designer has stuffed quite a lot of equipment details, such as a number of control instruments which, although rendered in plastic, are quite OK.
By far the best looking in my opinion is the instruments panel, which should be supplemented not only with dials in the form of decals, but also a gun sight. The latter can also be found on the transparent frame, but probably due to the different properties of the plastic, it’s more simplified.
Reproduced as a separate element, the backs of the fuselage machine guns (6) aren't very impressive. The same goes for the pilot's seat, although in fairness it must be stated that it is of a fairly decent thickness. As Arma Hobby has given up on adding photo-etched details, we only get the straps in the form of decals.
Behind the seat goes frame with relief holes marked by raised lines, and an armour plate. However, it seems that AH forgot about the transparent armour plate mounted behind the pilot's head, because, looking a bit ahead, there is no such element on the transparent sprue.
The shelf behind the absent armour plate requires the holes marked on the underside to be drilled when the radio is installed.
Notice a sinkmark on the latter (68). No worries though – the manual says not to install it anyway.
Now a word about suspensions. One pylon can be installed underneath the wing centre (by first drilling the appropriate mounting holes, marked on the inside of the lower part of the wings).
On that – an additional fuel tank, with details that are a little too pronounced for my taste.
Or a bomb – two option available, 250 or 500lb.
The Pitote tube (70) and the dorsal antenna (69) left to be mentioned.
Although the use of the latter (or rather a fragment of it) in one of the proposed machines is overlooked in the manual, but clearly shown in the boxart and corresponding colour profiles.
3D print
As mentioned above, the kit contains a single resin piece prepared with the use of 3D printing technology.
It directly replaces the plastic part and does not require any major tampering with the plastic.
Transparencies
The Airacobra is in several respects a rather unconventional design for a single-engine fighter from the Second World War. It is, for example, one of the few machines of its kind with “car type” doors. In the model those were designed as separate parts, which makes it possible to install them in open position (although it is worth remembering that the left one was opened much less frequently).
The rest of the cabin glass was prepared as a single piece.
There are a couple more details on the frame, literally – the aforementioned gun sight and the under-wing reflector glazing.
The latter would benefit from a little polishing.
Masks
The included self-adhesive masks will simplify the painting of both the cab windows and the wheels.
This also includes painting the inner surfaces of the cabin doors.
Weights
The other, admittedly rather uncommon addition are the metal beads which should be used to weigh down the nose of the model.
Little thing, but probably many modellers will be pleased.
Decals
The enclosed marking sheet is, as usual, the result of collaboration with Polish Techmod company. Closer inspection of the piece reveals nothing to complain about.
The print is clear and the colours are saturated and uniform.
Tiny stencils and instrument panel make a very good impression.
The sheet contains also the wing walkways, Curtiss company markings for the propeller and the seatbelts.
Manual
The booklet containing instructions on how to build the model represents the typical style of this manufacturer.
The drawings are aesthetic and easy to read, with a number of annotations highlighting critical moments of the construction process.
Suggested paint colours are listed in a table.
The paint schemes, as usual in colour, include also guidelines on the main markings arrangement.
Stencils layout is shown on the separate scheme.
Painting schemes
The kit in question can be made in one of three schemes, which are traditionally advertised on the back of the box. Those are.
P-400 Airacobra „white 13”/„Wahl Eye”, 39FS/35FG, pilot Lt. Eugene A. Wahl, Port Moresby, New Guinea, Summer 1942.
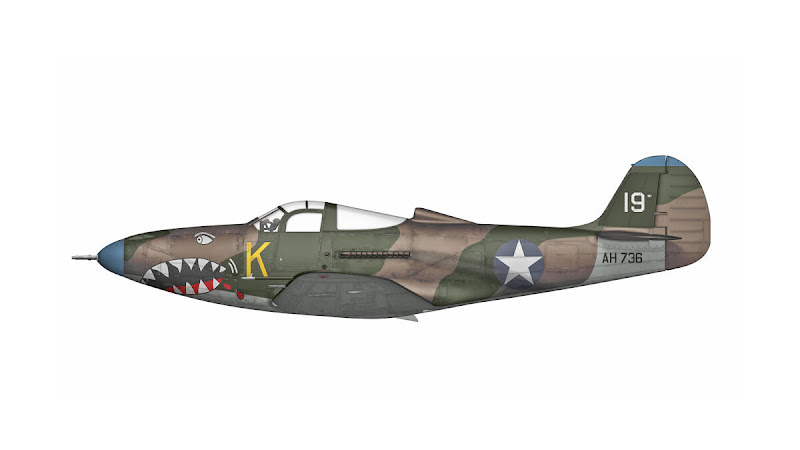
P-400 Airacobra „white 19”, AH736, 80FS/8FG, Turnbull Airstrip, Milne Bay 1942.
P-400 Airacobra „white 13”/„Hells Bell”, BW151, 67FS/347FG, pilot Lt. Robert M. Ferguson, Guadalcanal, August-November 1942.
That’s quite a lot of teeth.
Summary
This is the fourth Airacobra (after Q, N and "Cactus") by Arma Hobby for 1:72 scale enthusiast. Looks as good as the previously released ones. In a nutshell – a great starting point for building a miniature of one of the uglier fighters of the Second World War.
I like it.


