1:48 Hurricane Mk IIc trop

It hasn't been long since the launch of Arma Hobby's 48th scale Hurricane, and a new edition has already hit the shelves, this time letting us build a tropical variant. Let's take a closer look.
Disclaimer
The review sample was kindly provided by the manufacturer. Thanks, Arma Hobby.
Overview
The kit with catalogue number 40005 comes in a standard, side-opening box, with a rather nice illustration by Piotr Forkasiewicz on the front.
As is usual with the larger boxes from AH, the kit components are protected by an additional, rigid, cardboard insert.
Inside – three injection moulded sprues made of grey plastic, small transparent one, decals, masks and assembly manual.
The plastic parts are, as you might easily guess, a repeat of those known from the previously released kit with the “regular” Hurricane Mk.IIc (see review).
Grey plastic
Let's begin a more detailed inspection of the kit content with the fuselage, divided quite traditionally, lengthways into two halves.
With one exception. The underside of the tail section (with a quite nicely marked linen covering) was designed as a separate element and we get it in two variants, one of which is unused in this edition.
But let's go back to the earlier mentioned halves and take a closer look at the considerable amount of both raised and recessed surface details, which look quite decent, to say the least. One small downside is the area around the little fairings located on either side of the engine, on the horizontal panel line behind the exhausts. Incidentally, this detail was missing in the first renderings of the model presented by the AH (and it's not on the colour profiles in the manual either), which may explain the appearance of this section a bit.
Both the rudder and elevator were designed as separate pieces, installed to their respective stabilisers.
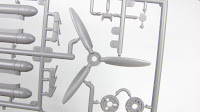
Two spinners are provided for the three-blade propeller and the assembly's mounting method allows it to remain mobile.
Exhausts are another multi-variant component, with two sets available on the sprues (only those marked with 16 are to be used). Unfortunately, they don't look the best (no exhaust holes), which will probably prompt many modellers to reach for out-of-box replacements.
Let's return to the fuselage halves one last time, to take a peek at the inner surfaces of the cockpit sides, which are enhanced by a number of small equipment details (parts 32-36).
The space in between is to be filled with quite nice looking main structural elements.
The control column (17-19) and the rudder pedals (21, 22) don’t look bad either.
Since the model doesn’t include photo-etched details, the pilot's seat (25-28) can be fitted straight out of the box with decal straps only.
Prints will also enhance rather nice looking instrument panel (29) with compass (30).
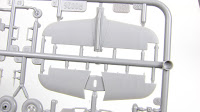
Let's move on to the wings, which are in my opinion the most interesting part of the kit. This is because both the upper and lower surfaces have been showered with a whole bunch of different details. Of particular note are the rivets, featured both in raised and recessed form. This mimics the variation of such joints present on the real machine, where flush rivets were used on the surfaces with the greatest influence on the airframe's aerodynamics (e.g. wings’ leading edge), and standard mushroom-headed ones on the remaining surfaces. It should also be noted that the raised rivets and bolts come in several sizes.
Cut-outs in the leading edge of the wing were prepared for the installation of cannons (more on that later) and landing lights (parts 47 and 48 plus glazing).
Meanwhile the underside features slots for easy installation of the oil cooler (5, 7 and unlabelled part 6) along with its housing (3, 4, 8).
Nearby one will also attach the carburettor air intake with tropical filter (28, 29). The standard one (14-15) will remain on the sprue this time.
Structural elements of the main landing gear bay also got a dose of varied surface details.
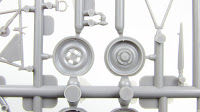
Raised rivets can also be found on the fairings, and the two-piece wheels are notable for the inscriptions on the tyres' sidewalls.
The latter can also be spotted on the tailwheel, the assembly of which was prepared in two versions.
The miniature's guns, in the form of four wing cannons, comes in two variants too. Both of which require at least drilling the tips.
Plastic sprues also include parts for making the under-wing bombs along with the racks (suggested for one of the paint schemes).
Alternatively, additional fuel tanks are available (also for one machine). In both cases the appropriate mounting holes must be drilled in the lower part of the wings (marked on the inside), as the instructions indicate in advance.
Finally, let's take a look at a handful of minor details such as the aerial mast (58), the pitot tube (57), exhaust glare shields (59, 60), and the retractable entry footstep (50).
The last one should be only installed if the handhold behind the cockpit was left open.
Transparent plastic
The transparent sprue is filled mostly by canopy elements of a very good transparency and definitely acceptable thickness.
The windscreen is complemented by backward-sliding part in two variants – depending on whether you want to install it in the open or closed position.
One will find here also a handful of minor details such as glass for landing lights and the rear-view mirror.
Two types of the latter provided – round one and rectangular.
Masks
The included masks, cut in the familiar and well-liked yellow adhesive paper, will help with painting the canopy.
Small oversight – manual doesn’t specify which group of masks goes on which type of the sliding section.
Decals
The markings prepared in the form of decals are a collaboration between the model manufacturer and Techmod.
As usual, this means a quality print with not much to complain about.
Stencils and instrument panel looks nice and clear.
Modellers who prefer “out of the box” experience will have to use pilot straps from the decal sheet – there are no alternatives in the kit.
Manual
The booklet with step-by-step instructions on building the model is typical for AH. Clear and easy to follow assembly drawings sprinkled here and there with additional comments.
Suggested paint colours listed in a table.
Paint schemes, as usual in colour, with decal placement directions.
Usual stuff.
Markings
With included decals one can make a miniature in one of three painting options, traditionally hinted on the back of the box. To quote the manufacturer, those are.
Hurricane Mk.IIc trop “Hurribomber”, LB792/C, No. 34 Squadron RAF/SEAC, Dergaon (Assam) and Imphal (Manipur), spring 1944, pilot S/Ldr C.P.N. Newman.
Hurricane Mk.IIc trop, HL885/AX-Z, No. 1 Squadron SAAF, Lt. Stewart “Bomb” Finney, LG142, Egypt, September 1942.
Hurricane Mk.IIc trop, HL851/GO-P “The MacRobert Fighter-Sir Iain”, No. 94 Squadron RAF, El Gamil airfield, Egypt 1942-43.
There are also provided complete squadron code letters for the last one.
Summary
The model in question is essentially a repeat of the previous Hurricane from AH, with a new range of “tropical” markings. There is still some room for complaints – the lack of nice seatbelts, poor exhausts – but those are only minor shortcomings, that are overshadowed by the overall high quality of the kit. This is, in fact, an excellent starting point for modellers wishing to build a “tropical” variant of the Hawker fighter, or, with the use of additional decals, a “normal” Mk.IIc.
I like it.


