FM-1 & FM-2 Wildcat Deluxe Set

FM-1, another Wildcat version prepared in 1:72 scale by Arma Hobby, arrives in a slightly different format than previous models – and this isn't just a matter of the "luxury" two-pack edition. Want to know more? See below.
Disclaimer
The review sample was kindly provided by the manufacturer. Thanks, Arma Hobby.
New, but not quite
As you can easily guess, this set consists of two models. Wildcat FM-2, which has been available in a standard solo edition for some time now (and which has been reviewed here), and the new one – FM-1, the sprues of which are also well know. How is it possible? Well, this is simply a F4F-4 kit (also reviewed here), to which we have to make some minor changes (fortunately there were no drastic differences between the two variants). So you will not find here any really new sprues, hence perhaps such different introduction of the FM-1 miniature to the market.
The box
The kit in question comes with the catalogue number 70050 in a slightly larger than usual box that opens from the side.
The rigidity of the packaging and thus the safety of the plastic parts is ensured by a cardboard insert, so you can put the model away to the stash and cover it with more "to do" boxes without any worries.
Of course after closely examining the contents – two sets of plastic sprues (two grey and one transparent per model), three small sheets with photo-etched details, a double dose of self-adhesive masks, a sheet of decals, instruction manual and two plywood sections of the aircraft carrier's deck.
This is a bit much, so without further delay let's move on to the closer inspection of the parts.
Plastic FM-1
Let's start as usual with the fuselage (known from the F4F-4 model), which can be used without any adjustments to build the FM-1 version (spoiler: differences will appear only within the wings).
Grid of fine recessed panel lines, plus some raised details such as inspection flaps hinges. The overlapping of panels was not replicated and there is no complete riveting present.
Handful of details on the inner surfaces, but that doesn’t mean that the cockpit was handled poorly. About that later.
Arma Hobby doesn’t use slide moulds technology in the production, so the engine cowling has to be assembled from a couple of pieces.
The engine unit is an area to which the model designer has paid particular attention. Miniature Pratt & Whitney R-1830 Twin Wasp has two separate rows of cylinders.
Each complemented by a separate ring with pushrods covers.
Plus carburettor intake pipes for the rear.
And two front covers versions, of which this time we will only be interested in one (part no. 16).
Quite nice already, but that’s not all. Assembled engine goes on the firewall.
On the other side of which another piece is mounted, with the radiators (and some small sinkholes).
Then there’s the part with the starter (7).
And some engine frame fragments.
Including oil reservoir on the upper one.
Wrapping up the subject of propulsion, we should also mention the exhausts (30).
And three-bladed propeller.
Which hub we will cover with a relevant piece – in this case only one of them comes into play (22).
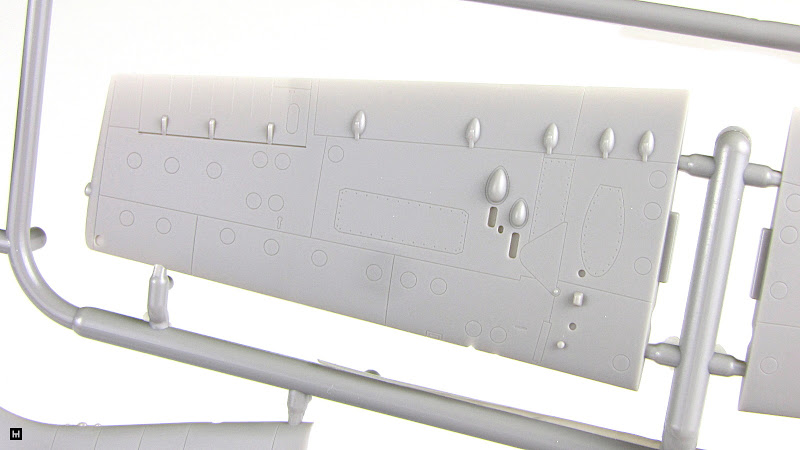
Now to the wings. Surface details looks similar to the fuselage – thin engraved panel lines and a handful of recessed and raised details.
Although the latter ones are definitely more numerous on the lower surfaces.
The F4F-4 wings need to be brought to the FM-1 standard by removing some details and completing a few panel lines, as the drawings in the manual clearly state.
Revised wings can be complemented by radiator covers with quite acceptable edges (11, 12).
The control surfaces were accented quite subtly, both on the wings and the rudder.
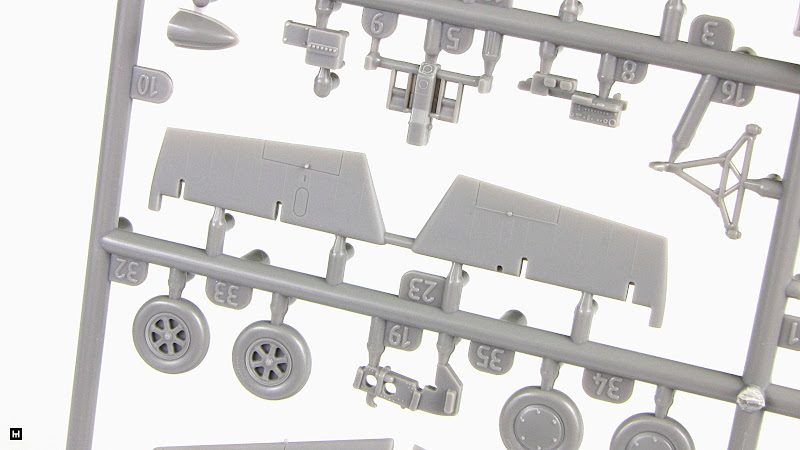
In the picture above you can also see the tailwheel, one of the two we should use in this version. The second one (21) can be found on a smaller frame, together with the third one, which is of no use to us.
There you will also find a separate elevator, that can be tilted without any trouble.
Of course after installing the horizontal stabilizer in the correct location.
Additional fuel tanks can be installed under the wings, as long as you don’t forget to drill mounting holes in the lower wing halves (don’t worry, the manual reminds you to do this at the appropriate point).
Small sprue also contains parts for the cockpit interior. From the main structural elements in the form of a floor and bulkheads.
To the seat and control stick. All in all quite well detailed compartment, even ignoring the dedicated PE elements supplied in this edition.
With photo-etched parts we will also enhance the rear bulkhead of the vast main gear bay, which itself looks quite nice.
As well as the entire undercarriage assembly, where the main gears…
…complemented by a number of different supports, including the more delicate ones, will create an elaborate module that can be inserted into the model even after the painting.
In order to help those who found this stage of construction difficult in the FM-2 model (and I have seen quite a few comments like this), the manufacturer added a template to make assembling the landing gear supports easier. Nice.
The main landing gear wheels are available in two styles, but this time we will need only one of them.
Whereas the plastic covers of the main undercarriage (which reside on the frame right next to the fuel tanks) may not be used at all – this time we also get them in a photoetched version.
Plastic FM-2
Parts of the FM-2 model present a similar level of detail as the FM-1 ones. Fuselage has been marked with a grid of fine recessed panel lines. Complemented with some raised details, such as inspection flaps hinges.
The model lacks complete riveting or reproduction of the overlapping panels.
There aren't many details on the inner surfaces of the fuselage.
Arma Hobby does not use slide moulds technology in the production, so the cowling had to be split apart.
Only the front ring is given in one piece (10).
At first glance, the engine unit can look rather simplified. Except that it’s not. The FM-2 version was equipped with a Wright R-1820 Cyclone – a single-row engine, where the spaces between the cylinders were filled with metal shields. That's just like in the model.
The above element is to be supplemented with a crankcase cover (3)…
...and then mount on a firewall (11), which also features exhaust pipe ends visible under the rear edge of the engine cowling. These have subtly marked edges of the exhaust holes, but probably many modellers will decide to drill them a bit.
To the finished engine we will attach three-bladed propeller cast as one element…
…and end it all in one of two ways.
Now to the wings. Model design does not provide the possibility of making them in a folded configuration, which depending on the point of view can be considered either a plus or a minus. Thin trailing edge and position lights cast entirely with one half of the wing are on the other hand an unquestionable advantages.
In terms of surface details, wing looks similar to the fuselage – thin panel lines and a handful of recessed and raised details. Plus rather fine surface of ailerons.
The same is true for the FM-2's distinctive tall rudder, which was moulded as a separate component.
Those who want to hook up a HVAR rockets (appropriate for one of the painting options) under the miniature, should pay attention to the inner surfaces of the wings lower halves, where markers have been placed to help out drill the appropriate mounting holes (although the trace of the mega ejector pin can be a bit inconvenient).
The rockets themselves need to be assembled from two elements each – a body…
…and rear with stabilizers – a little thick as plastic parts often are.
The remaining elements (cockpit equipment, additional fuel tanks, landing gear) can be found on a smaller sprue – same as the one discussed above for the FM-1 version, so I won't repeat myself here.
Transparencies
The sprue with transparent elements remains to be addressed. It’s universal for all released Wildcats, so two copies were provided in this set.
Windshield and the sliding part of the canopy have been designed as a separate parts, of quite decent thickness.
Little worse as far as transparency is concerned, but there is no tragedy.
There are also underside cockpit windows on the frames, which we will only be interested in when building the FM-1 version, and the glass of the underwing reflector, with which the matter is identical.
Masks
There are also two sets of masks cut in the Orafol film (ongoing problem with Kabuki paper availability?) included in the set. According to the manual, these should be two different sheets – one known from the F4F-4 model and the other, of course, from FM-2.
Yet I found two identical, universal ones in the box, simply labelled F4F.
PE
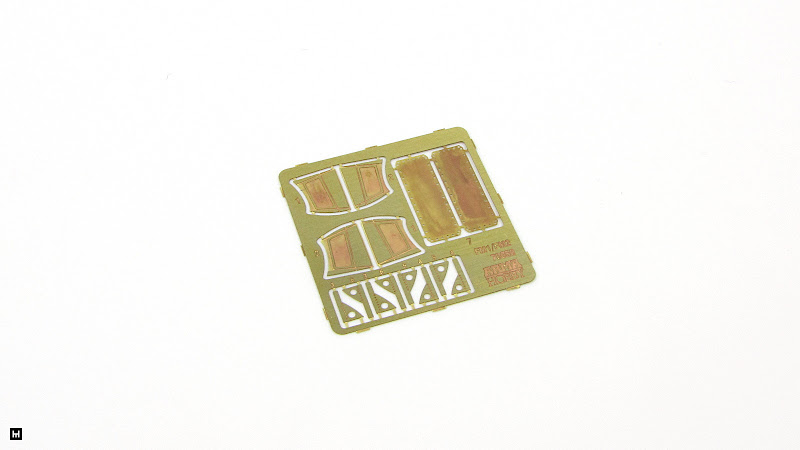
Among the included photo-etched sheets there is one completely new, which includes larger ammunition bay covers (for the FM-1 wings underside) and landing gear covers.
The others, known from the FM-2…
…and F4F-4 sets…
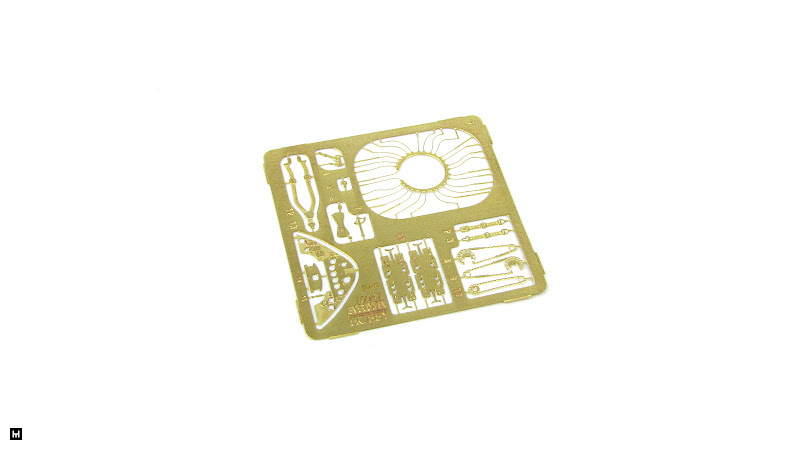
…are a collections of details such as the instrument panel, pilot's belts, and additions for the power unit. Traditionally there is no foil with the flight instruments – the appropriate part of the decal sheet should be used instead.
Decals
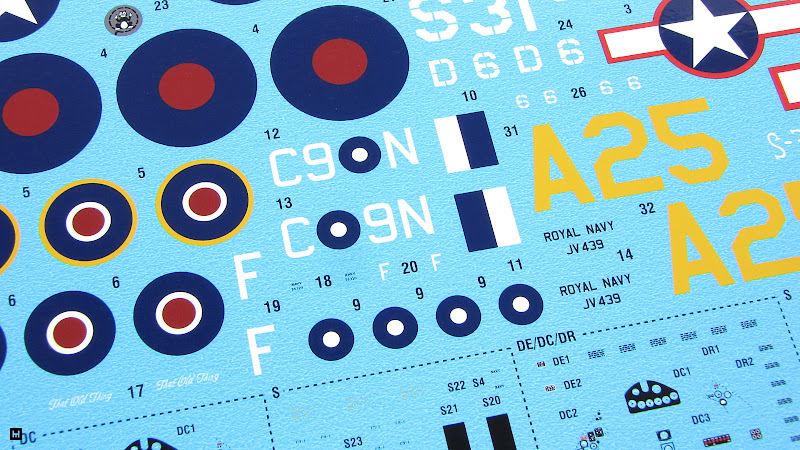
The substantial markings sheet was printed by Polish Techmod, so high quality is to be expected.
The print is clear, the colours are saturated and I did not find any defects such as layers offset.
Small stencils can be easily read.
Apart from external markings there are also bits for the interior, such as the instrument panel and seatbelts. I’m very pleased to see engine data plates included here as well.
Unfortunately this time there is also a fly in the ointment.
Well, it happens to the best.
Manual
Printed on glossy paper, the booklet was prepared in a style characteristic for this manufacturer. Little thicker than usual, it is a compilation of instructions known from two previously released versions of Wildcat.
Additional views, renderings and comments appearing here and there should help at critical moments or remind you of important actions during construction.
The list of suggested paints includes numbers from Hataka (Orange Line), AK Interactive (Real Colors), Lifecolor, AMMO, Humbrol (!), Vallejo and Tamiya palettes.
As usual, the paint schemes have been prepared in colour and also include information about decals placement.
The doubts related to the personal names of some machines (on one or both sides of the plane?) have been clearly indicated, and the choice is left to the modeller.
Painting options
The kit in question shows eight marking options on the back of the box, four for each of the titular variants of the American fighter. This also includes the British versions, as you can also build Wildcat V and VI straight from the box. One by one, quoting the manufacturer, we have the following options available.
FM-1 Wildcat, no. A32/S31, VC-33 squadron, USS Nassau CVE-16, 6 September 1943, during training on the California coast, shortly before embarkation on USS Coral Sea CVE-57. Three colour camouflage used on Pacific with red outline markings from summer 1943.
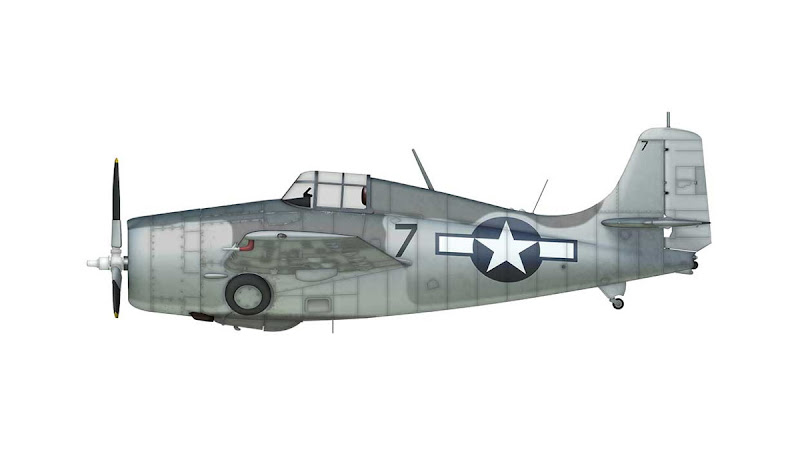
FM-1 Wildcat, no. 7, VC-6 squadron, USS Core CVE-13, 16 December 1943, during anti-submarine patrols over the North Atlantic. Three colour Atlantic camouflage (ASW I), with grey fuselage sides, designed for warm and less cloudy waters.
Wildcat V, no. JV439/C9-N, 733 Naval Air Squadron, piloted by Sub-Lieut. Griffiths, Trincomalee airfield, Ceylon, 1945. British Temperate Sea Scheme camouflage and South East Asia Command markings.
Wildcat V, no. JV579/F, “That Old Thing”, 846 Naval Air Squadron, aircraft carrier HMS Trumpeter/Eglington airfield. The unit provided anti-submarine cover during the Normandy landings of June 1944. British Temperate Sea Scheme camouflage with Invasion Stripes.
FM-2 Wildcat, no. D6, “Judy”, VC-14 squadron, USS Hoggatt Bay CVE-75, the Philippines, 22 November 1944. Three tone Pacific camouflage and late war stars with dark blue outline.
FM-2 Wildcat, no. 6, “Hot Lips”, VC-99 squadron, USS Hoggatt Bay CVE-75, Pacific Ocean theatre, July 1945. Dark Blue Pacific camouflage used since June 1944 r.
FM-2 Wildcat, no. 4, VC-13 squadron, USS Tripoli CVE-64, March 1944, during anti-submarine patrols over the Atlantic in the vicinity of Cape Verde. Two tone Atlantic camouflage ASW II designed for cold and cloudy waters.
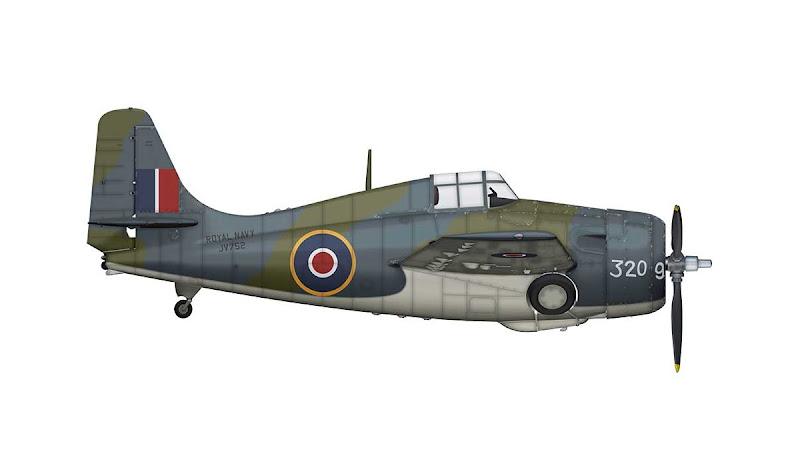
Wildcat VI, no. JV752/320-9, Aeroplane and Armament Experimental Establishment, test flown by S/L Janusz Żurakowski, Boscombe Down airfield, 14 February 1945. Aeroplane is factory painted with US colours similar to British Temperate Sea Scheme shades.
Quite diverse, there is a lot to choose from.
Additional bonus
This "deluxe" edition includes more than just the two models. In the box you will also find the bonus announced on the front in the form of two fragments of the escort aircraft carrier deck, made of laser-engraved plywood.
One is the middle portion of the deck, complete with mock-ups of arrester wire tensioners.
The second is a replica of the prow, with a fragment of the hangar elevator and the rear segment of the catapult channel.
Both are based on the deck of the Casablanca class vessels and can be used to display FM-1/FM-2 Wildcat and TBF/TBM Avenger aircrafts. This is what the manufacturer claims. I, on the other hand, would like to state that it is a very cool addition and probably many modellers will be disappointed after reading the next sentence. Because those stands cannot be bought separately, are only available in this particular set.
Summary
The new two-pack from Arma Hobby, although not a "completely new" thing, is in my opinion quite an interesting proposition for US naval aviation enthusiasts. British as well.
Making the Wildcat in the FM-1 variant does require some modifications to the parts, but the scope of the necessary changes is relatively small. For me it is a perfectly acceptable solution, but I understand that some people may be upset, because they would prefer a new moulding with fully fledged, correct wings.
But I don't think anyone will complain about the multitude of versions which can be made using the contents of the box. FM-1, FM-2, Wildcat V, Wildcat VI. If you want, you can also build F4F-4 or Martlet II with the right decals. After all, why not.


